
Getting started with RestoPhoto: the full step-by-step guide
RestoPhoto Team · June 12, 2026 · 7 min read
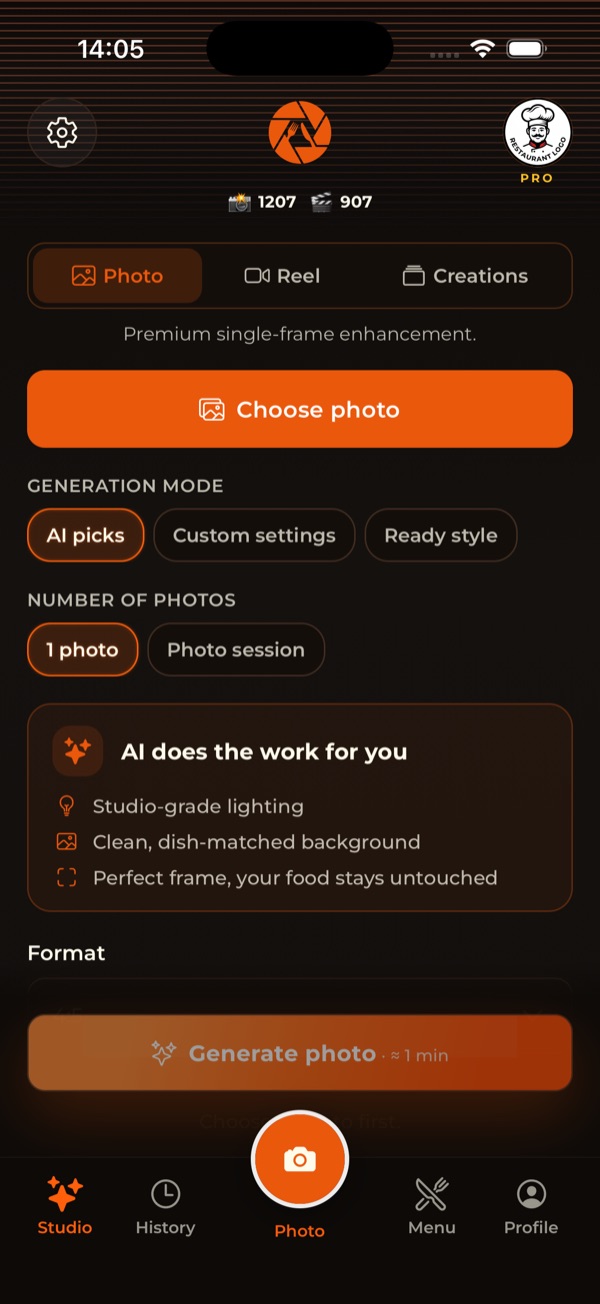
This is a full walkthrough of RestoPhoto: from your first photo to finished content. Every step has a real app screenshot or a preview of the available options, clearly and in order.
Studio: pick a generation mode
In Studio you upload one dish photo and pick a mode: AI picks (it sets everything up for you), Custom settings (you choose background, framing and style), or Ready style (a ready edit template). At the top you switch between Photo, Reel and Creations.
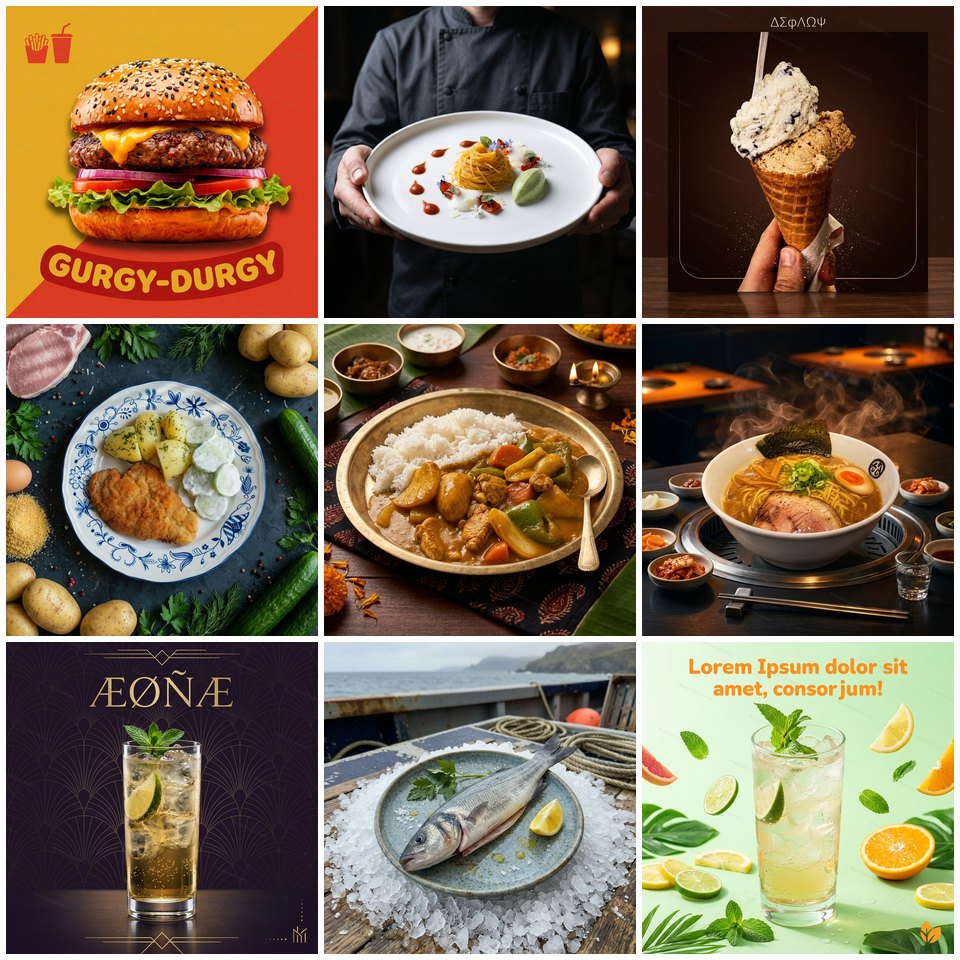
Ready edit styles (60+)
In Ready style you choose from 60+ presets: American diner, cafe, cocktail bar, Indian thali, Korean BBQ, ice cream and many more. Each style applies its light, background and mood to your dish, whether it is a burger, dessert, pasta or pizza.
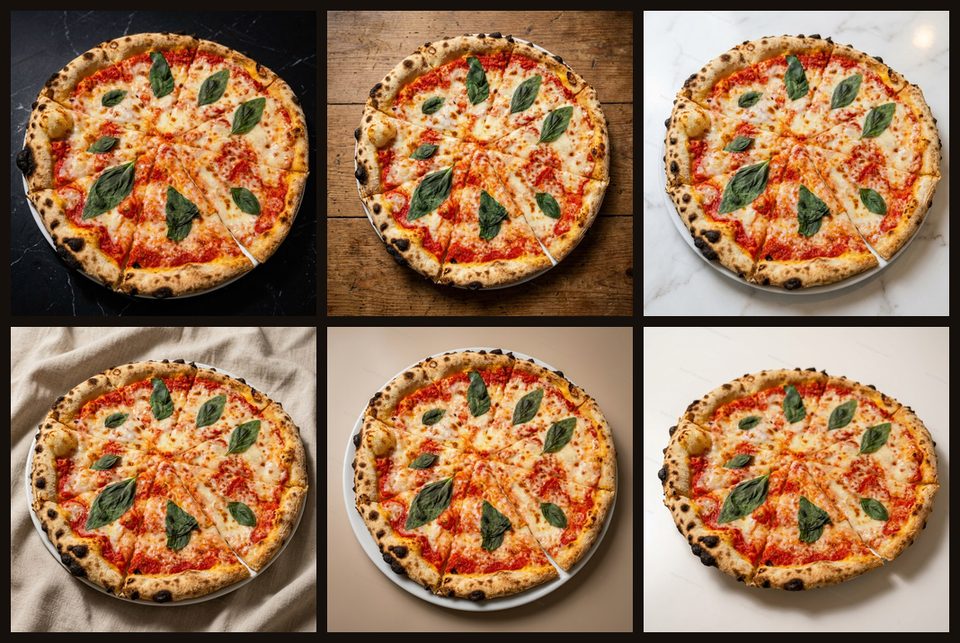
Choosing a background
In Custom settings you choose the background: black marble, rustic wood, light marble, draped linen, sunlit grass, neutral studio and more. You can also keep the original background or let AI pick the best one for the dish.
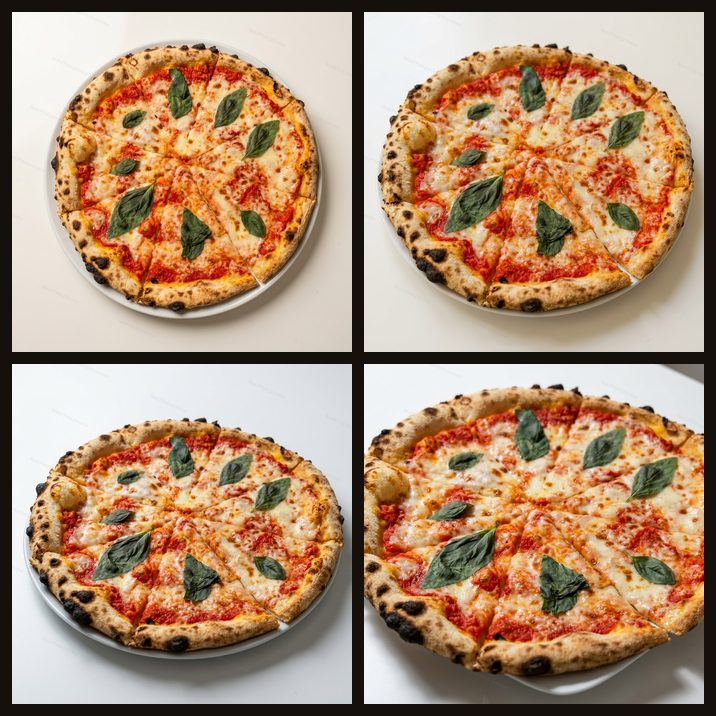
Choosing the framing
Framing decides the shot: top-down (flat-lay) for flat dishes, classic three-quarter, a low hero angle for tall dishes, a macro close-up on details, or a chef presenting the dish.
Add ingredients
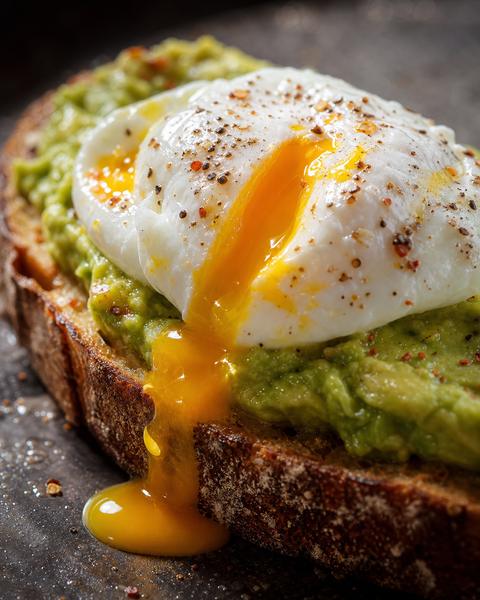
You can type the ingredients you want visible in the photo (for example bacon, cheddar, jalapenos, fresh basil). Before publishing, compare the result with the dish: check the ingredients, portion size and presentation. AI can change details.
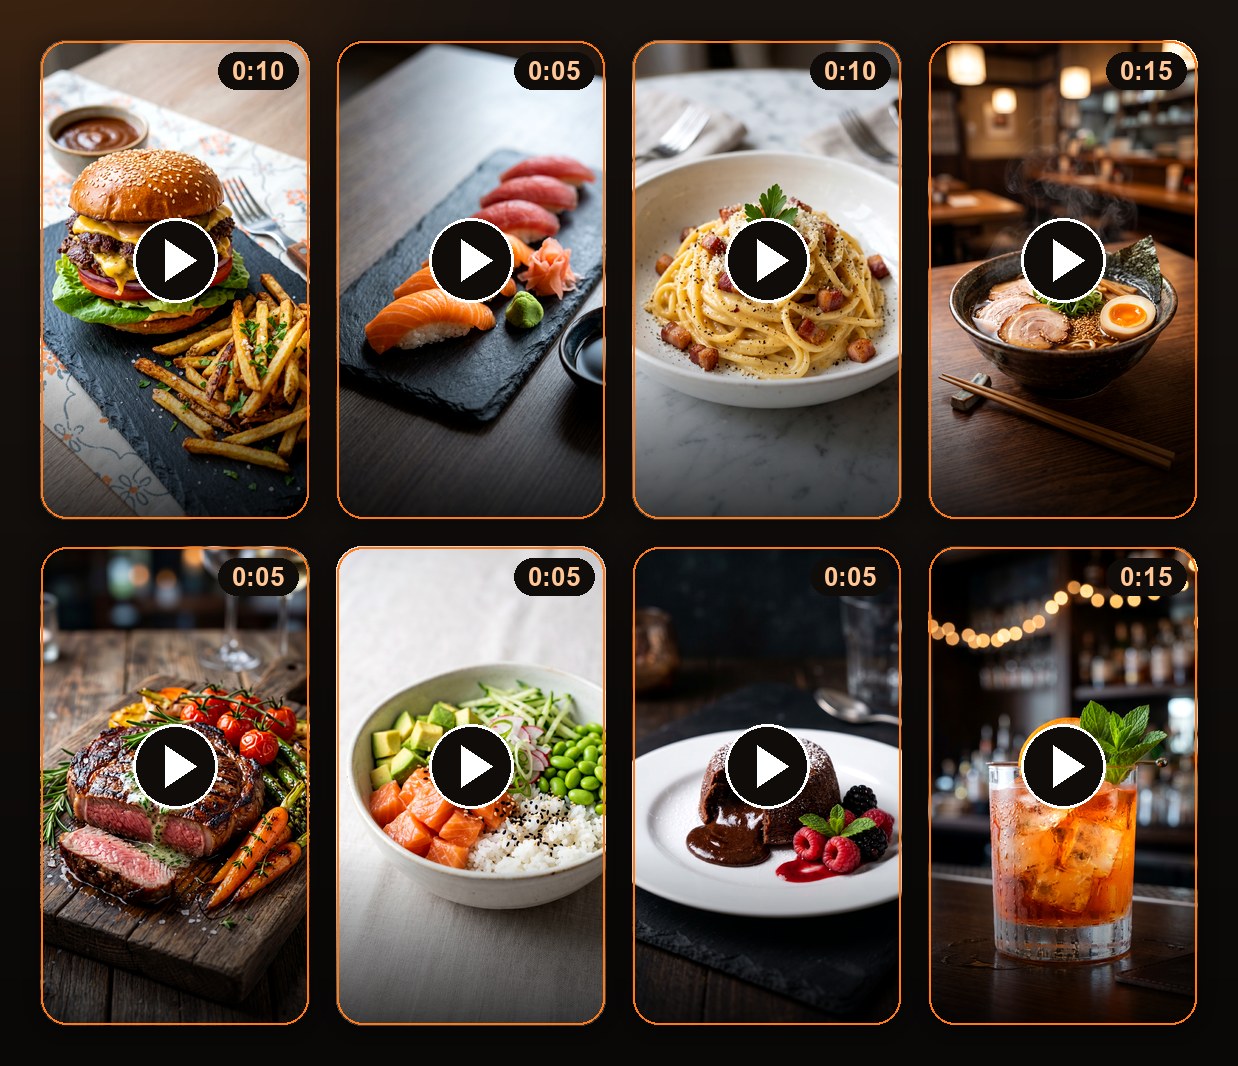
Reels: motion mode, music, voiceover
In the Reel tab you turn one photo into a vertical video. You pick the camera motion mode (orbit, zoom, three shots, commercial spot and more), add music from the library, and an AI voiceover in a natural voice and your language. On-screen captions are generated automatically.
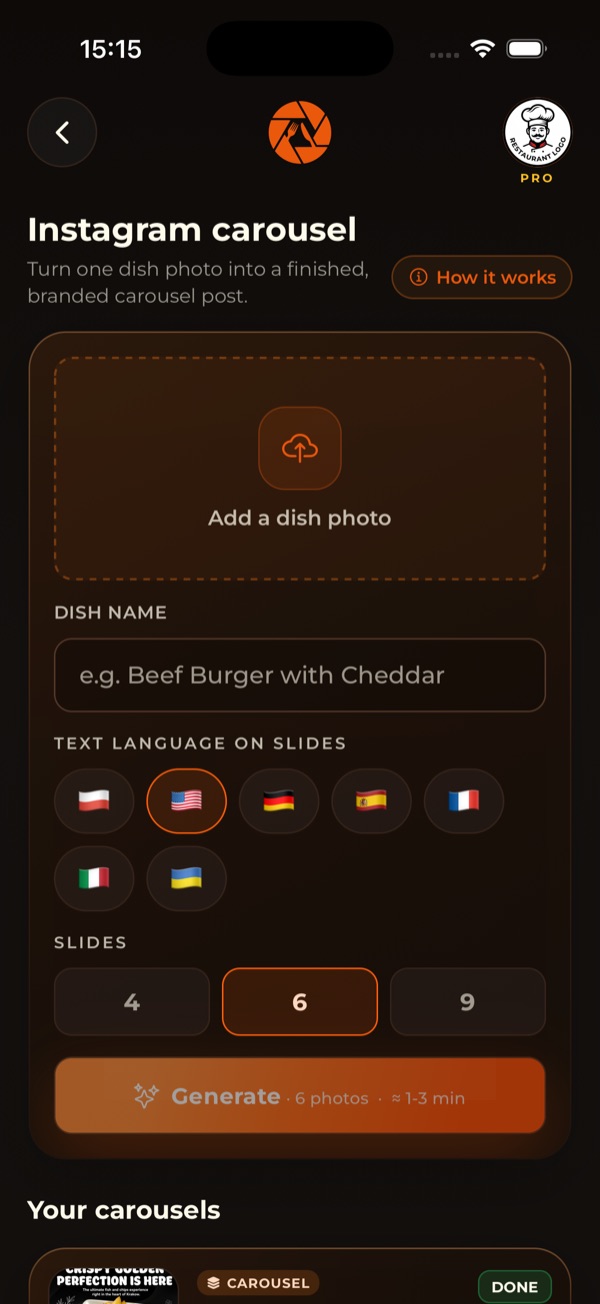
Instagram carousel
In Creations you build a carousel: upload a dish photo, type the name, pick the slide language and the number of slides (4, 6 or 9). You get a finished, branded carousel post.
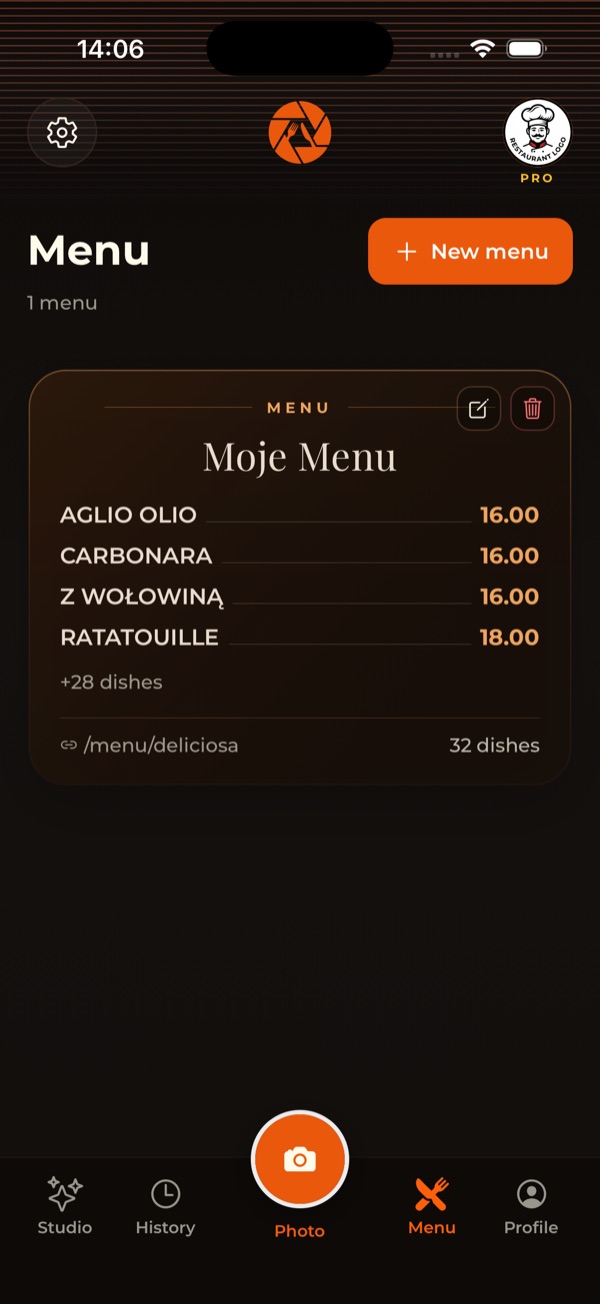
Digital QR menu
In Menu you build a digital card with a QR code: add dishes, prices and variants. Guests open the menu on their phone in their language, and you print the QR code for the table.
Content history
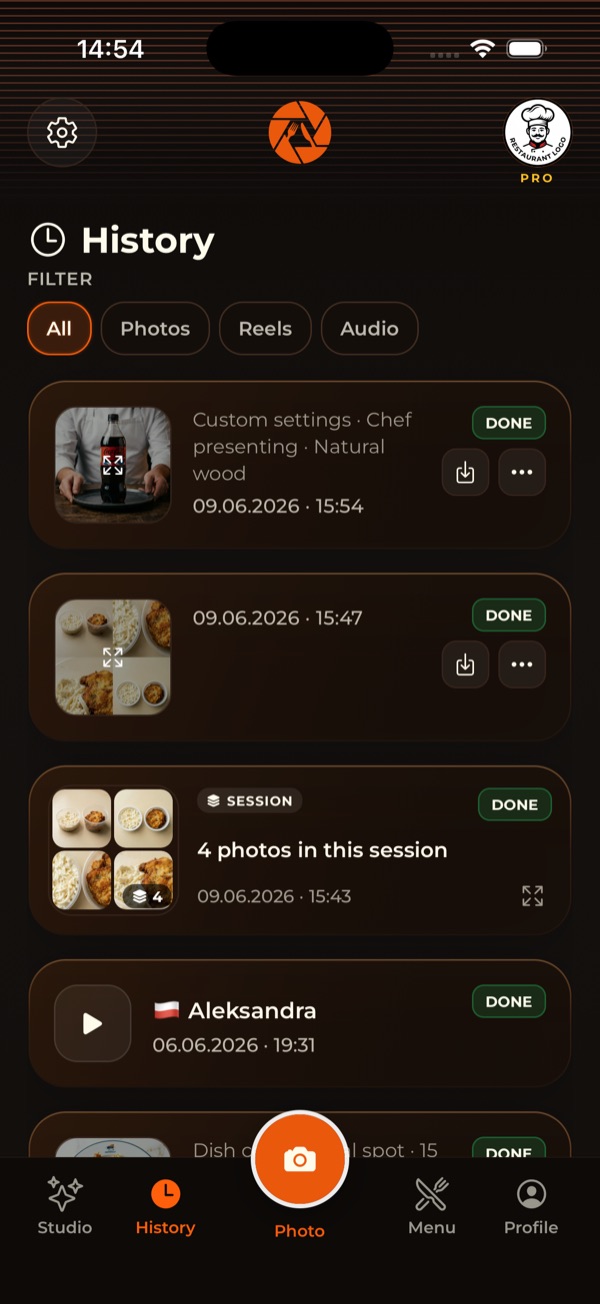
History holds every generated photo, reel and voiceover. You filter by type and download finished files whenever you need them.
Profile and plan
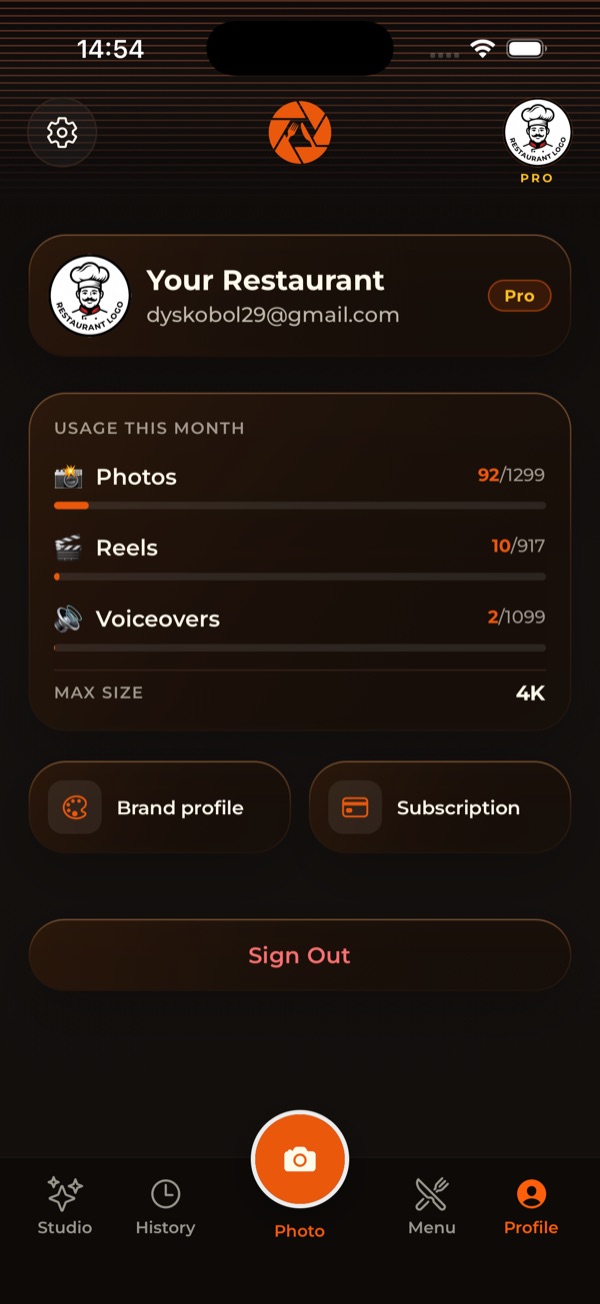
In Profile you check your plan and usage, set your logo and brand colors, change the app language and manage your subscription.
That is the full flow in RestoPhoto. Start with one photo in Studio and the rest is a few taps away.
Do it without a photographer
Upload one phone photo of a dish and RestoPhoto lifts it to studio quality, makes a reel and a QR menu. Without changing your dish.
Try RestoPhoto